i have a little promarker tutorial to share with you tonight.thankyou to wild rose studio for permission to use one of their images.i have used one of the milton and co stamps called toby with bottle.so with out further ado, lets get on :)

1.so first i stamped my image with momento ink onto a smooth white card.
here i have coloured him with SANDSTONE.

2.now using CARAMEL, go nearly all over your sandstone.

3.now use COCOA and go over nearly all your caramel.

4.now i have used HENNA but only a little over the cocoa.

5.next just a touch of WALNUT where your darkest areas would be.

6.take your SANDSTONE again and working in small circular strokes with your pen, blend all your colours together, i go from my darkest shade and work towards the lightest.you may need to do this a few times to achieve the effect you are happy with.

7.now for his tummy,ears and nose.first i have used PUTTY all over.then i have used SUNKISSED PINK nearly all over.

8.now a little TAN in the darker areas.

9.taking your PUTTY again, blend together in circular movements.

10.now i am doing toby`s glass and bottle of red :)
first RED all over.

11.then CARDINAL nearly all over the red.
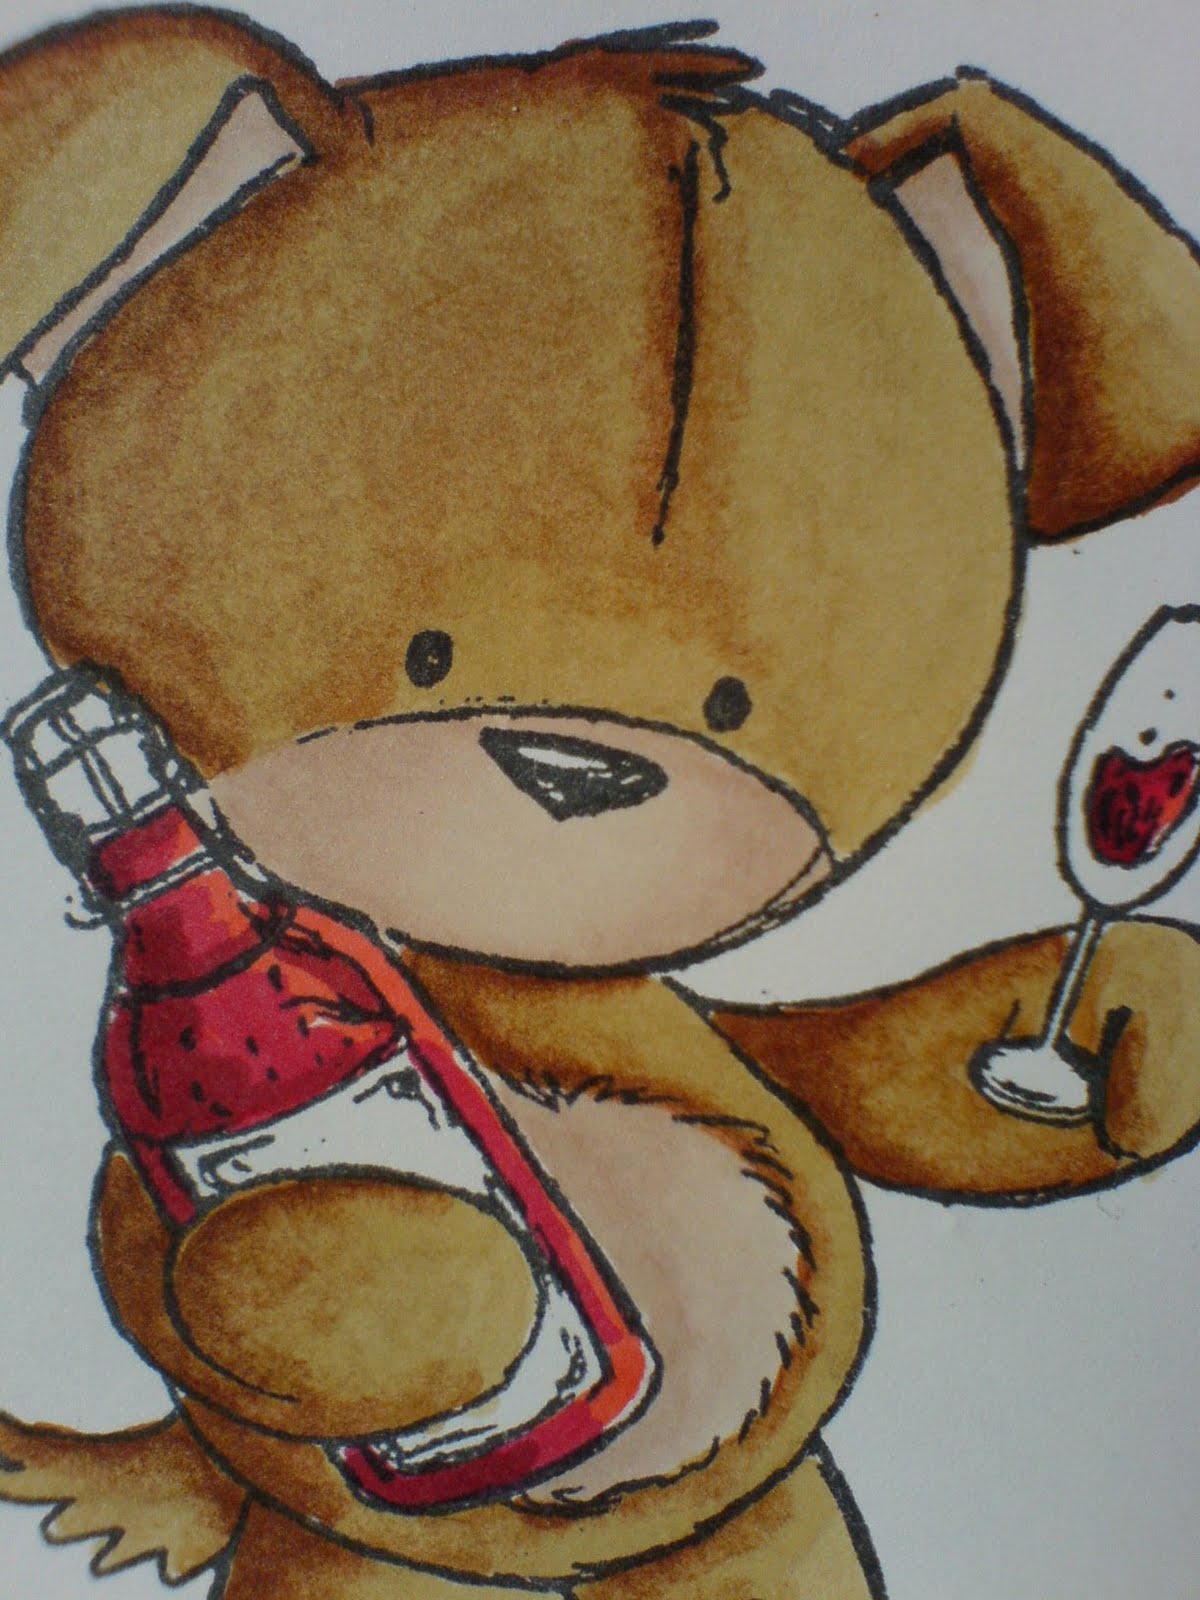
12.now a little BURGANDY in the darkest areas.

13.and blend together with your RED.

14.now for the wine label and cork, i first used BLUSH.

15.then nearly all over with VANILLA.

16.and then a little MUSTARD.

17.and then blended together with BLUSH.

18.i have used a little bit of PASTEL GREEN just on the edge of his glass.
all promarkers and this fab little image are available in crafty urchins :)
thankyou so much for looking at my tutorial and i hope it has been of some help.please do pop over to my blog here shortly to see the image made into a card.have a fab evening and please do let us know if you have found this tutorial helpfull.
luv coops.xxxxx
10 comments:
Another fab tutorial Nic, these are really helpful for us beginners. Think I need more promarkers in each shade to di it properly though! Thanks again xx
Wow girls, This is fabulous. Nic you are a star in the making! Fab pics and easy to follow words! Sheila:)X
thanks for the tips. I'm still getting to grips with my promarkers and every little helps. I've been starting with the darkest colours and blending out but this seems much easier and more effective. xx
What a great tut, it's helped a lot, I do struggle when colouring teddies. Thanks Nic. Hugs Debbie x
Hi Nic
A fantastic tutorial,thankyou for the tips,
Hugs Dianne xx :)
fabulous tutorial nic,x
Great tut Coops! you`re getting good at these! lol
love angiebabe xx
another great tutorial coopsy! thanks for taking the time to share your talent.
Excellent tut Coops! Really enjoyed it - so helpful.
Ednax
I love your tutorials, they are so easy to follow, thanks for your time
Tilly xx
Post a Comment