Monday 22 November 2010

Gorgeous Milton Bear

Hi good evening everyone its Tina DT member from Crafty Urchins.Hope you've had a good day and been able to chill.

I have added a card made by me using goodies from Wild Rose Studio, this is my favorite WS Christmas stamp.
Sorry for the delay again in posting, i need to get my act together, i don't know where the time go's, it's a good job Nic's on the ball.


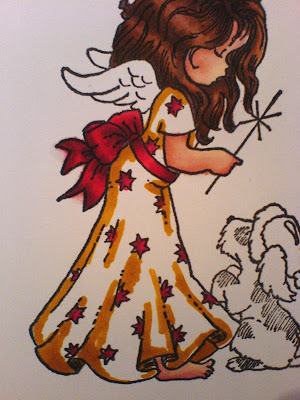
The image is coloured with Promarkers in the following colours,
Bear: putty, caramel and cocoa.
Stocking: lipstick red,ruby, and cardinal red. pear green, marsh green.
Sentiment is from Pink Gem.
The Edge of the image and sentiment has been inked with Peeled paint distress, stardust Stickles has been added for a bit of bling.


Thought I'd put a side view on for good measure, although my camera seems to be playing up today, me thinks pics don't seem too good.


A Woodware inverted punch was used in the corners, Sizzix Holly die, red pearls and ribbon for embellishments are from my stash.

Thanks for looking we really appreciate it see you soon Tina..X

Monday 15 November 2010

a flower tutorial by nic.

good evening all.dt member nic here with another tutorial for you.this time i am going to show you how to make this little flower below.quite a few step by step piccys so i hope you get to the end :D so here is the finished flower and below is how i made it.
1.for my flower i have used my blossom nestabilities but you could adapt this to a punch or other nestability shape.


2.i have used the 2nd and 3rd sized dies from the middle and cut each size out 3 times with scrap cream card.

2.i have then chosen 2 distress inks, i have chosen fired brick and spiced marmalade.you can use as many colours as you like, your choice.


4.i have used a heatproof mat or you could use a heatproof glass board and i have randomly dabbed my inks over the sheet.


5.now you need to spray a little water over your inks like this.


6.now you can leave it as it was or you can swirl the colours together like i have here.rubber gloves are optional :D


7.place your die cut flowers into the ink and cover on both sides.


8.whilst still wet with the ink scrunch your flowers up.

9.here they are all scrunched up.


10.gently unfold and dry each one with a heatgun.


11.now i am going to spray them all with a mica spray, i have used a pearl one.again totally your choice what you use.


12.here they are all sprayed.


13.again dry with them with your heatgun.


14.once they are dry, carefully tear down between each petal quite far down but not right to the centre.


15.scrunch them up again, poor flowers :D


16.gently unscrunch and then layer them up, starting with your 3 largest and then the 3 smaller ones.i use silicone glue to layer mine as it gives you a little time to play around but any adhesive or a brad will do the job too.


17.and here is the finished result.i have popped it onto the ink pad so you can see how big they are.i have used a pearl centre for mine.
you can really let your imagination go wild when making these.you could emboss your flowers with embossing folders or stamp onto them.the possibilities are endless.
i hope you found this tutorial helpfull in some way and thanks so much for popping by :D
luv nic aka coops.xxxx


Sunday 7 November 2010

PROMARKER TUTORIAL BY NIC.

good afternoon all.dt member nic here.sorry its been so long since my last post but lifes quite busy in the coops household,lol.so today i thought i would share another promarker tutorial with you.this time i am going to try and show you how i colour people in with my promarkers.this gorgeous sugar nellie stamp-angel wishes has been stamped with memento ink on to my card.

lets start,lol. 1.first i have used CORAL where i would like the shadows on her skin to be.

2.now i am using SUNKISSED PINK by going over the coral and more into the white area.


3.now all over with BLUSH.


4.now i thought it looked a little pale so i repeated steps 1 to 3 to get more depth.


5.to colour in her gorgeous hair i have started with SHALE where i want the shadows.


6.now i use WALNUT, again going over the shale and more into the white area.


7.now i use COCOA, i always go all over the previous colours and slightly more into the white area with each colour.


8.now all over with CINNAMON.


9.again i wanted more shadow so have just used a little more SHALE.


10.now the stars on her dress, no need to be too fussed on such a small area, so first i used BURGANDY.


11.and then CARDINAL.


12.for the bow,i have used BURGANDY first.


13.then a little CARDINAL RED.


14.all over with RUBY.apologies for the bleeding of the colours but nothing that your blender, chalks or cutting the image out won`t solve :D


15.now to colour her dress, i am hoping to get a gold colour this time so i start with RAW SIENNA.


16.then MUSTARD.


17.and then PASTEL YELLOW.


18.and again i wanted more depth so have added more RAW SIENNA.


this gorgeous sugar nellie image and full range of promarkers are available from crafty urchins.

well i hope you all liked my tutorial and that it was easy for you to follow.

you will get different effects on the intensity of the colours depending on your cardstock.

my tip is to keep experimenting with different card until you find one that suits you.

as always i`m not an expert but this is how i do mine.

remember the main thing is to have fun :D

ttfn

luv nic aka coops xxxxx


Tuesday 19 October 2010

dare to dream by nic.

good evening all.nic here :D
tonight i am sharing this card with you using a fabulous leane ellis stamp by sugar nellie.this one is called faraway thoughts and i chose my colours to try and look dream like, would love to know what you think.
products used are:
sugar nellie image.
white card coloured with promarkers for matting.
dovecraft basics papers.
sentiment (i`ve forgot who makes them, sorry sue:D)
promarkers.
pearl brad.
stardust stickles.
different voiles and pearl pen from my own stash, all other products available from crafty urchins :D


promarkers used are:
skin=blush,sunkissed pink,coral.
hair=lilac,lavender,amethyst.
sky=baby pink,dusky rose,antique pink.
sea=artic blue,sky,cyan.
boat=cool grey 1,3,4.

and a sideways view.
thanks so much for visiting.always appreciated.
luv nic aka coops.xxxxx

Tuesday 5 October 2010

Penpal and Lizzie with Muff

Hi everyone, its Tina member of Crafty Urchins DT team . Sorry for long delay in postings but I have been ill and i am only just getting things back on track. These gorgeous cards are made by Jane another of our DT members.


Jane has used the Whiff of Joy image Penpal, coloured in by Promakers with following colours,


Skin: Ivory and Blush.

Hair: Sandstone and Caramel.

Jeans: Pastel Blue and China Blue.

Shirt: Meadow green and Leaf green.

Headband and belt: China Blue.

Flowers and hearts : Poppy Red.

Around the image: Cool Grey 1

White gel pen for highlights.


The background was stamped with a stamp Jane's had in her stash for ages the company no longer exists.Although we carry a similar stamp in from inkadinkado Fountain pen, envelope front and back stamps are from Dimension Fourth. Jane has layered the envelope front stamp on a angle which gives a great effect.


The image has been layered on to oval Nesties with foam pads , the stamped background was matted onto turquoise and silver card. A inverted punch was used at corners.


This a a side view of the card i think the base card was an 8x8 but Jane tends to make random sizes then worries about the envelopes and boxes, well lots of box lids later! Hey artistic licence at work!!!


LIZZIE WITH MUFF


The image used for this card is Lizzie with Muff from Whiff of Joy.


She has been coloured in with Promarkers in the following shades,

Hair: Sandstone, Caramel and Raw Sienna.

Skin: Ivory and Blush.

Coat and Boots: Azure Blue.

Muffs and scarf: Powder Blue.


The image has been cut out and mounted on the card with foam pads for extra dimension.
The stamp Jane used is Snowflake trail by Inkadinkado. Ink, Cyan blue Versafiine, Pearl blue embossing powder.


White snowflake peel offs on acetate were used for embellishments with white pearls for extra bit of bling. The sentiment is from Jane's stash. All items apart from things from Jane's stash are available from shop.


Here is the side view aren't the the colours fab, very clever our Jane.


Thanks for looking we really do appreciate it. I will try and not leave it so long with the next posting, happy crafting Luv Tina....x